3D Repo Integrated with Unreal Engine
Following on from our recent announcement about our new integration with Epic Games’ Unreal Engine, we’ve put together a quick guide to show you how to import your 3D Repo models into the Unreal editor.
Why have we done this?
High-frequency updates and the complexity of CAD and BIM have historically limited the adoption of real-time rendering in AEC. Assets end up being hard-coded which means a new game needs to be deployed each time there is an update, and it’s difficult to access the BIM data for other workflow tasks such as BI analytics, project management, and operations.
The 3D Repo Solution
3D Repo solves these problems by providing a fully automated and open-source version control BIM platform in the cloud, able to process large amounts of data in minutes for real-time rendering whilst preserving full fidelity, regardless of file size. Furthermore, assets are delivered on-demand via APIs to provide the most up-to-date project data.
The 3D Repo Unreal Plugin provides you with a convenient way to dynamically load BIM models from the cloud straight to your custom Unreal App.

3D Repo also provides native support for all popular file formats including IFC, RVT, DGN, BCF, FBX, and OBJ. We also support these file formats via our Navisworks Plugin: DWG, DXF, DWFX, RVT, SKP, 3DS, DGN, IFC, NWC/NWD, PRT, SLDASM, and SLDPRT.
Visit our API page for more info or check out our support centre for more guidance.
Load the 3D Repo demo Unreal project
- Download and unzip the 3DRepo4UnrealEngine (BETA) plugin, and enter the repounreal directory.
- Right-click the .uproject file and select Generate Visual Studio project files. This will build a Visual Studio solution in the same directory.
- Open the Visual Studio solution.
- Set the repounreal project as the start-up project, and Start Debugging. This will open the Editor with the debugger attached, which thereafter can be interacted with normally.

The project will have the demo account web configuration hardcoded in. When you are using your own account you can confirm the URL/API are correct in repounreal.cpp:
Confirm that these two string variables in the SampleGameModule called URL and apiKey have the correct values.
It should match the details as displayed in this section.
Loading a model
The sample code registers two console commands: 3drepoimport & 3drepoconvert.
- Open the console, press the Tilde ¬ key (usually located underneath the Esc key), or open the Output Log (Window > Developer Tools > Output Log).
- Make sure you have the model ids and revision ready. Refer to this section for more details.
- Give the command: 3drepoimport [teamspace] [model id] [revision tag] . The use of a revision tag is optional.
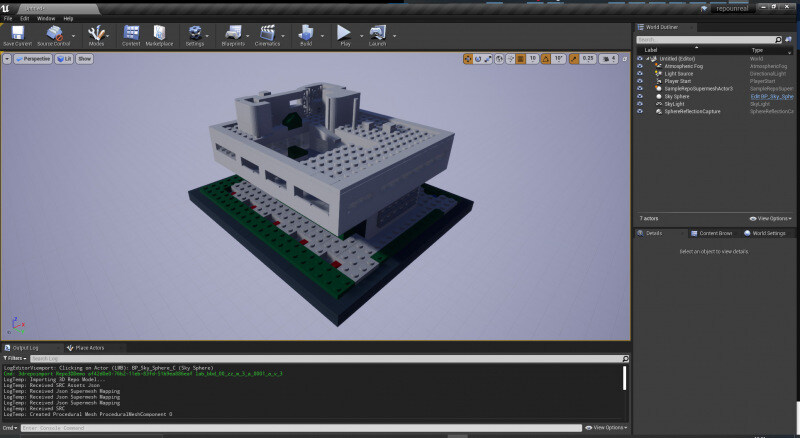
Here is an example command: 3drepoimport Repo3DDemo af42d0e0-76b2-11eb-83fd-51b9ea886eaf r1
The model will be imported as a new Actor in the world.

The 3drepoimport command can be given at design-time (in Editor) or in-game (e.g. in Play-In-Editor mode).
That’s it!
Find a full list of plugins and other useful tools on our downloads page.
You can also find a full list of help and support materials on our support page.
2 minute read
Asite Insights in your inbox.
Sign up for product news and our latest insights published monthly. It's a newsletter so hot, even global warming can't keep up.


